 Save
Save The first time I watched a chocolate bomb dissolve into a mug of hot milk, I felt like I'd stumbled onto culinary magic. My neighbor had brought them over as a housewarming gift, and I remember standing in my kitchen at 7 AM, still in my bathrobe, completely mesmerized by the way the marshmallows floated up like tiny clouds as the chocolate melted. That moment changed how I thought about hot chocolate—it went from something you tolerate in winter to something you genuinely anticipate. I started experimenting in my kitchen that same afternoon, and these have become my favorite thing to make for people I care about.
I'll never forget the rainy Sunday when my daughter's friend declared these "the best thing I've ever tasted," and then immediately asked if we could make more. We spent the entire afternoon in the kitchen, and I loved watching them get excited about melting chocolate and filling shells—it wasn't fussy or stressful, just joyful. That's when I knew this recipe was special, not just because of how they taste, but because of the moments they create.
Ingredients
- High-quality dark or milk chocolate, chopped (300 g): Use the best chocolate you can find—it really matters here since chocolate is the star. I prefer a mix of dark and milk for complexity, but choose based on what you love to drink.
- Unsweetened cocoa powder (6 tbsp): This is your flavor anchor, so don't skip it or use the sweetened stuff. I learned this the hard way when my first batch tasted flat.
- Powdered sugar (6 tbsp): It dissolves seamlessly into the hot milk without any grittiness, which is why it works better than granulated.
- Mini marshmallows (1 cup): These are essential for that delightful surprise moment—they puff up and float, making the whole experience feel indulgent.
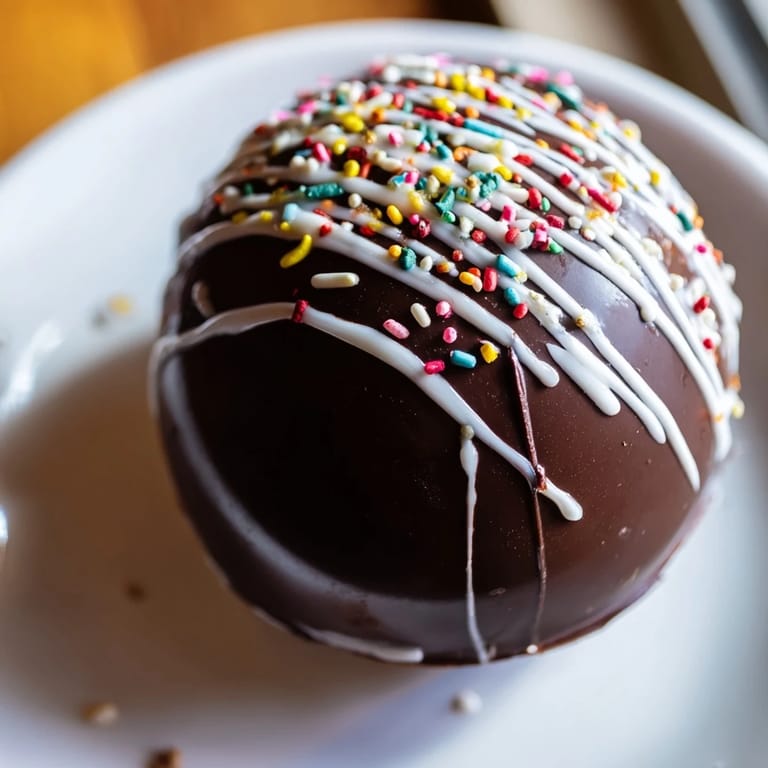
- White chocolate, melted (50 g, optional): For drizzling and decoration if you want them to look extra special.
- Sprinkles (to taste): A fun finishing touch that makes them feel celebratory.
Tired of Takeout? 🥡
Get 10 meals you can make faster than delivery arrives. Seriously.
One email. No spam. Unsubscribe anytime.
Instructions
- Melt your chocolate gently:
- Use a double boiler or the microwave in 30-second bursts, stirring between each burst. This prevents lumps and keeps your chocolate silky smooth, which matters more than you'd think when you're coating molds.
- Build sturdy shells:
- Brush the silicone molds with melted chocolate, refrigerate for 10 minutes, then add a second layer and chill again for 10–15 minutes. This double-layer method is what keeps the bombs from cracking when you unmold them.
- Carefully unmold your chocolate spheres:
- Gently run warm water over the outside of the mold or let it sit at room temperature for a minute. The shells should pop out easily if you've chilled them enough.
- Fill with intention:
- Into each shell half, add 1 tablespoon of cocoa powder, 1 tablespoon of powdered sugar, and a generous spoonful of mini marshmallows. I like to heap the marshmallows a bit—they compress when you seal, and that's where the magic happens.
- Seal your bombs:
- Warm a plate in the microwave for just a few seconds, then gently press the rim of an empty shell half onto it to melt the edge slightly. Quickly press it onto the filled half and hold steady for a moment. The warmth makes the chocolate tacky enough to bond.
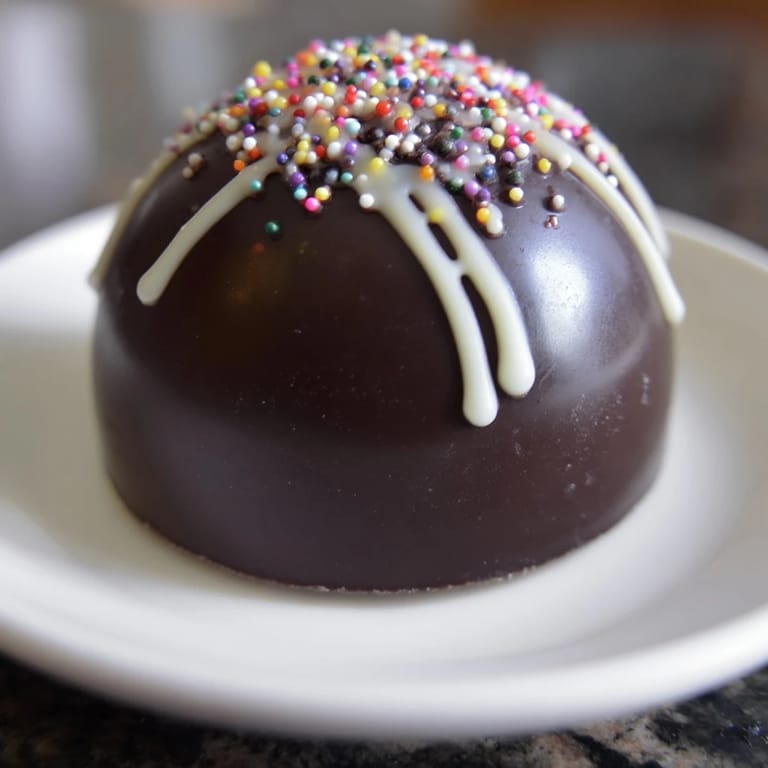
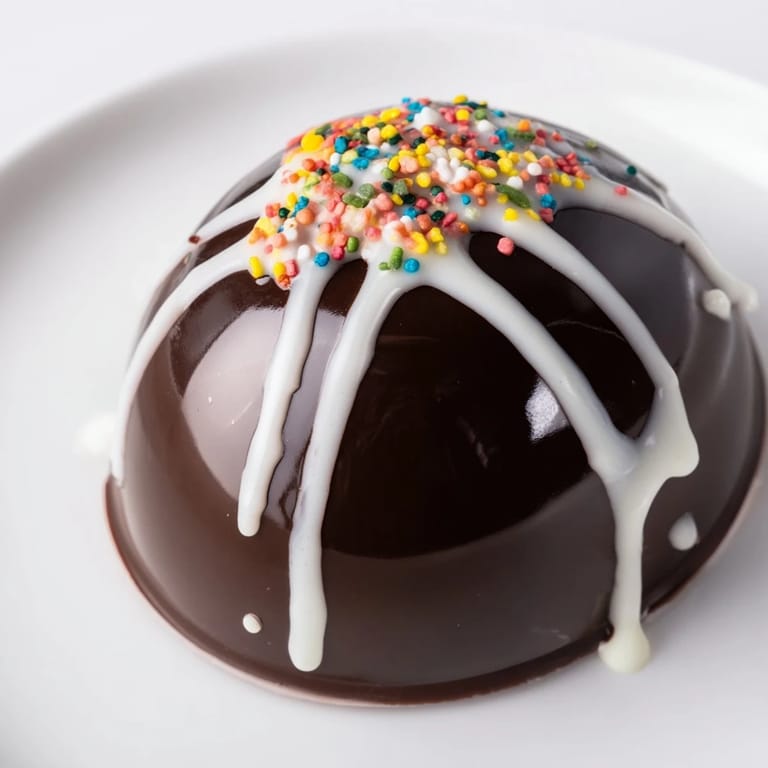
- Decorate if you like:
- Drizzle with melted white chocolate and add sprinkles while the chocolate is still soft. Let everything set at room temperature or in the fridge for a few minutes.
 Save
Save There's something deeply satisfying about gifting these to someone and then getting a text later saying they loved the moment their hot chocolate turned into this creamy, dreamy indulgence. That's become my favorite part of making them—not just the chocolate spheres themselves, but the joy on people's faces when they experience that little revelation in a mug.
Flavor Variations That Actually Work
Once you master the basic version, playing with flavors becomes fun. I've experimented with adding a pinch of cinnamon or cayenne pepper to the filling for something spicy and sophisticated, and that combination genuinely surprised me with how well it worked. You can also swap mini marshmallows for flavored ones, or crush up peppermint candies and fold them in for a winter twist. The filling is forgiving enough that you can get creative without worrying about ruining the structural integrity.
Chocolate Selection Matters More Than You Think
I used to think all chocolate was basically the same, but I was wrong. When you're relying on chocolate as your main ingredient, the quality shows up in the final cup of hot chocolate. Higher cocoa butter content makes smoother shells that unmold more gracefully and taste less waxy. I've found that a blend of dark and milk chocolate gives you the best of both worlds—richness from the dark and creaminess from the milk.
Storage and Gifting Strategy
These keep beautifully in an airtight container at room temperature for up to two weeks, which makes them perfect for advance preparation or gift-giving. I like to arrange them in a small box with tissue paper, and there's something special about handing someone a box of homemade hot chocolate bombs—it feels personal in a way that store-bought treats never do.
- Store in a cool, dry place away from direct sunlight to prevent the chocolate from blooming or sweating.
- If you're shipping them as gifts, pack them carefully with padding since the shells are delicate.
- These also freeze beautifully for up to a month if you want to make a big batch ahead of time.
 Save
Save Making these has become one of my favorite kitchen rituals, and I hope they become one of yours too. There's something wonderful about creating something that brings such immediate joy to the people you share it with.
Cooking Questions
- → What type of chocolate works best for the shells?
High-quality dark or milk chocolate provides the best smooth texture and rich flavor for the shells.
- → How do I ensure the spheres set properly?
Apply two even layers of chocolate and chill between each to create sturdy shells that hold their shape.
- → Can I customize the filling flavors?
Yes, adding spices like cinnamon or chili powder or using flavored marshmallows can add unique twists.
- → What is the best way to seal the spheres?
Gently melting the rim on a warm plate before pressing halves together creates a smooth, sealed edge.
- → How should these spheres be stored?
Keep them in an airtight container at room temperature for up to two weeks to maintain freshness.