 Save
Save The clatter of measuring cups always wakes up something hopeful in my kitchen, but shaping German bread rolls for the first time felt almost ceremonial. There was flour dusting the morning air, crackling radio somewhere in the background, and that patient anticipation while the dough rose beneath a tea towel. No two rolls ever turn out the same, and that surprise is half the fun. When slicing through a still-warm roll, the aroma reminds me why these simple Brötchen are such a staple for cozy breakfasts or lazy Sunday lunches. If you've ever craved real bakery flavor at home, this recipe delivers it in spades.
The last time I baked these rolls, my friend brought over homemade jam and we ended up eating half the pan right at the table, tearing off steamy pieces and laughing about our failed attempts at neat slicing. It's hard to stay formal when crumbs fly everywhere and everyone wants a second helping.
Ingredients
- Bread flour (or all-purpose): The backbone of the rolls, creating that signature airy crumb—bread flour makes the crust chewier, but all-purpose works if that's what you have.
- Salt: Never skip it, it highlights the subtle sweetness and rounds out the taste.
- Instant dry yeast: Essential for a reliable rise; make sure it’s fresh by checking the date.
- Sugar: Just a touch balances flavor and helps the yeast get going—don’t skip it, even if you’re skeptical.
- Lukewarm water: Warm to the touch, but not hot—if it feels like a gentle bath, you’re right on target.
- Unsalted butter, softened: It adds subtle richness; let it sit out while you prep for easy blending.
- Water for brushing: This little touch is what brings out that coveted golden crunch on top.
- Poppy or sesame seeds (optional): Adds a bakery finish—kids love to sprinkle them on, and grown-ups appreciate the extra texture.
Tired of Takeout? 🥡
Get 10 meals you can make faster than delivery arrives. Seriously.
One email. No spam. Unsubscribe anytime.
Instructions
- Gather and mix:
- Measure out the flour, salt, yeast, and sugar into a big mixing bowl, tossing them together with your hands or a wooden spoon until evenly combined.
- Add wet ingredients:
- Pour in the lukewarm water and softened butter; the moment you mix, the dough begins to come together with a subtle, comforting aroma.
- Knead and wait:
- Work the dough for 8–10 minutes until it's ultra-smooth and stretchy—if you stop to tap it, you’ll hear that satisfying slap against the bowl.
- First rise:
- Cover with a tea towel and let sit somewhere cozy—dough doubles in size and springs back when poked, a sure sign it’s ready.
- Shape the rolls:
- Punch down and divide into 10 pieces; rolling each into a tight ball, then gently pressing them flatter, can feel strangely therapeutic after a busy day.
- Tray and showing off:
- Arrange on parchment-lined trays and, if you want that authentic look, score the tops—don’t worry if they’re not perfect, rustic is charming!
- Second rise:
- Drape loosely with a towel and let rise 30 minutes; you’ll notice the dough looking plumper by the minute.
- Heat and prepare:
- Get the oven roaring hot to 220°C (430°F) and fill a small dish with water for a steamy bake and extra-crisp crust.
- Brush and bake:
- Sweep the tops with water, add seeds if you like, and let the scent fill your kitchen as they bake to a golden finish in 18–20 minutes.
- Cool and enjoy:
- Move rolls to a wire rack—the crackle as they cool is the best sound—and try to wait at least a few minutes before tearing in.
 Save
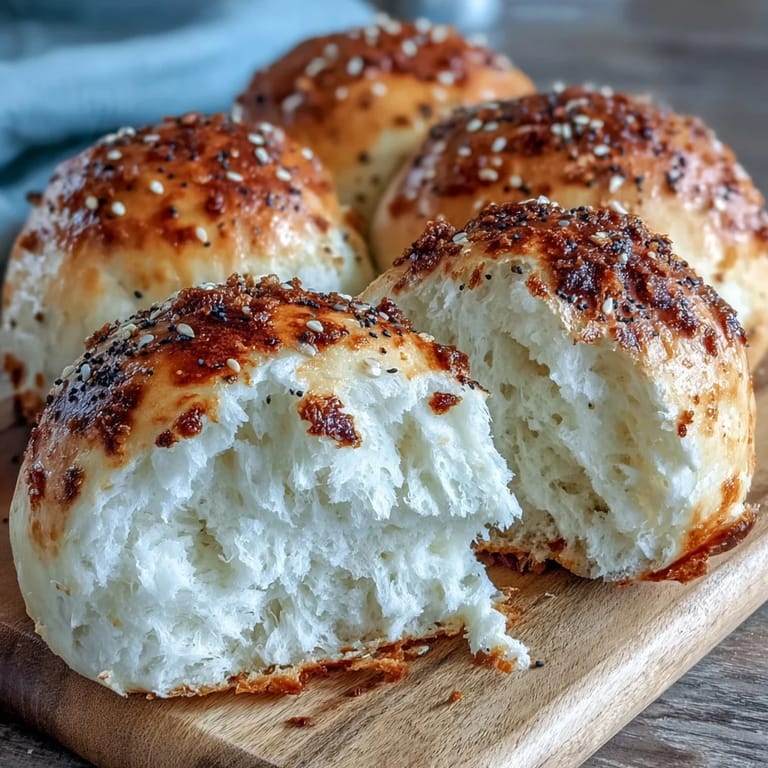
Save One chilly evening, these rolls turned a simple lentil soup supper into an occasion—everyone reached for seconds, and the conversation lingered long after the plates were empty. There's a special hush at the table the moment that first crackly roll is broken open.
Getting the Dough Just Right
At first, I panicked whenever my dough seemed sticky, but with time I realized that's a good sign—stickier dough gives you lighter, airier rolls. Resist the urge to add too much flour while kneading; trust that a little mess means better texture.
Toppings and Twists
Some mornings we’ve gone wild, mixing in different seeds or a pinch of malt powder, and even trying cheese on top—each batch comes out with its own character. The kids now claim sesame is “the best,” but I think poppy will always have a special spot.
Serving and Storing Tips
If you have leftovers, these rolls freeze beautifully, and a quick bake at high heat brings them right back to life. Try pairing them with homemade jam or slicing them for easy sandwiches—the possibilities are endless.
- Warm the rolls briefly before serving for that fresh-baked feel.
- If doubling the batch, use two trays and rotate them halfway for even baking.
- Let the rolls cool at least 10 minutes before slicing to keep the crumb perfect.
 Save
Save These Brötchen have become a welcome tradition for any morning that needs a little extra warmth. May your kitchen be filled with as much joy (and as many crumbs) as mine.
Cooking Questions
- → What gives these German rolls their crisp crust?
The secret is brushing the tops with water and adding a dish of water to the oven for steam, creating a golden, crispy finish.
- → Can I use all-purpose flour instead of bread flour?
Yes, both bread flour and all-purpose flour will work well, though bread flour often yields a chewier texture.
- → How should I store leftover rolls?
Keep them in an airtight container at room temperature for up to two days, or freeze for longer storage and reheat as needed.
- → Are there topping variations for these rolls?
Poppy seeds and sesame seeds are classic choices, but you can also leave them plain or add oats for extra flavor.
- → What do these rolls pair well with?
They’re delicious served warm with butter, cheese, marmalade, or alongside soups and salads for any meal.